Your Digital Office Structure
As introduced in the overview, the Organizational Structure is the official company-wide map for all work. It provides a shared, hierarchical view so everyone knows where to find different teams and processes. This structure is built from two simple components:📂 Areas and ⏹️ Spaces.
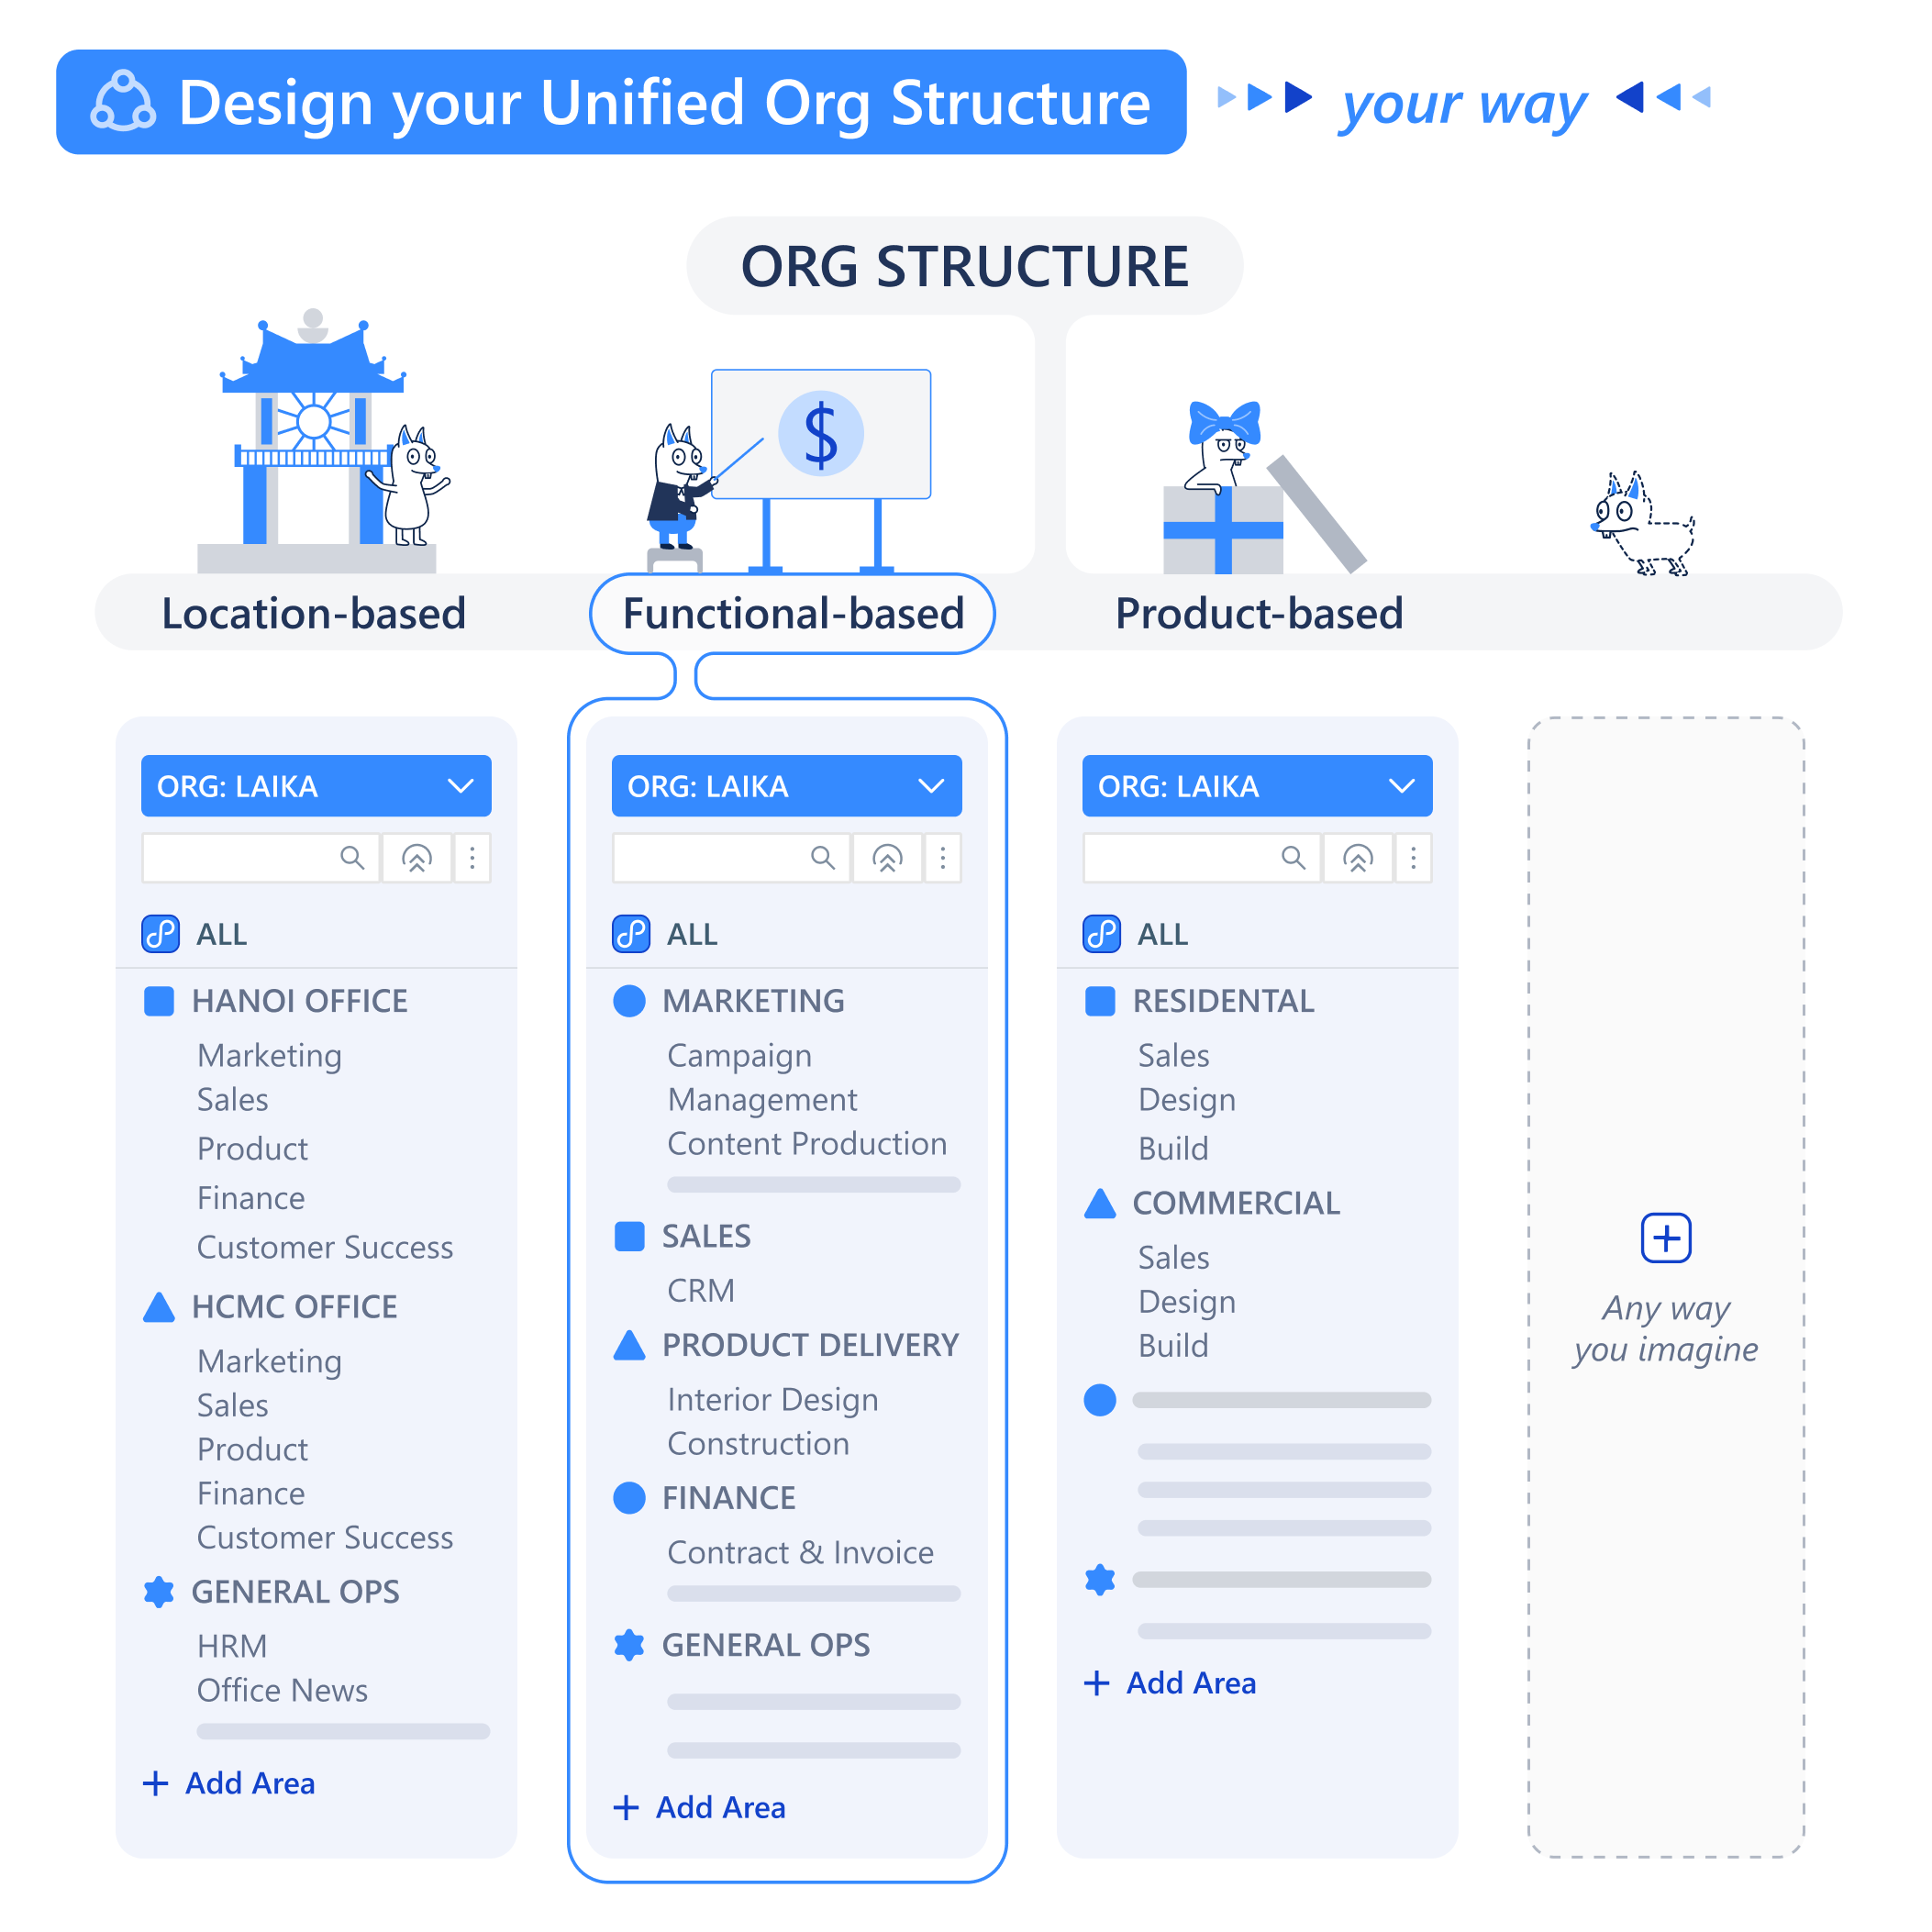
- An
📂 Areais the cabinet drawer, used to group related topics (e.g., “Finance Department,” “Marketing Projects”). - A
⏹️ Spaceis a specific folder inside that drawer, dedicated to a single project or process (e.g., “Q4 Budgeting,” “New Website Launch”).
📂 Areas: Grouping Your Workstreams
An Area is a high-level container used to group multiple, related Spaces. The primary purpose of an Area is to bring organizational clarity. You can create Areas that mirror your company’s structure, such as departments, long-term initiatives, or client portfolios. As a manager, you can create new Areas and move Spaces between them to keep your digital workspace tidy and intuitive.
⏹️ Spaces: The Live Work Environment
A ⏹️ Space is the most important concept in daily operations. It is the actual, live environment where your team collaborates to get work done on 🧊 Objects.
The most critical thing to remember is that every
Space is created from a 📋 Function blueprint. The Space inherits all the logic—the Workflows, Data Fields, Automations, and Roles—that was designed in the Function. The Function is the plan; the Space is the real building where work happens.How to Create and Manage a Space
As a manager, one of your key tasks is to create and configureSpaces for your team.
Create Flexible Collaboration Rooms with Workspaces
What’s Next?
You now know how to structure your team’s workspace by creatingSpaces from Functions. The next step is to understand the daily activities that happen inside these Spaces.