Security Meets Collaboration
The central challenge in any powerful business system is balancing two critical needs: protecting sensitive information and enabling seamless collaboration. Systems that are too open are a security risk. Systems that are too locked down create friction and slow down work.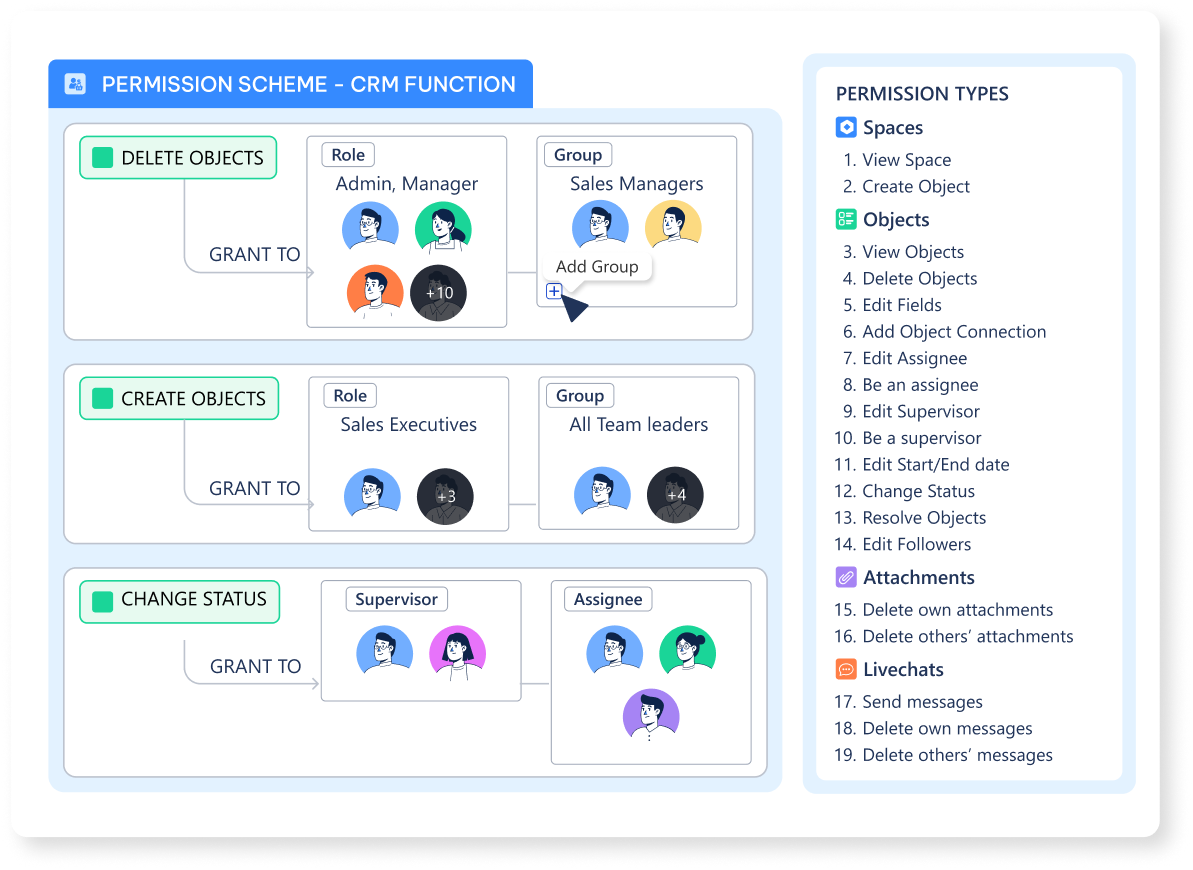
🧊 Object.
The 3 Tiers of Control
To understand how security works, think of your Luklak instance as a secure corporate campus. To do any work, a person must pass through three distinct levels of security checks.This model ensures that permissions are always explicit. A user must have the right credentials at all three tiers to perform an action, providing comprehensive and predictable security.
[Image Placeholder: A diagram showing a funnel with three sections labeled Tier 1, Tier 2, and Tier 3. An icon of a user is at the top, passing through each layer to reach an icon of an Object at the bottom.]
Tier 1: Business Privilege - Your Campus ID Badge
This is the highest and most fundamental level of access. A user’s Business Privilege determines if they are allowed onto the campus at all and defines their maximum potential authority. It’s the first gate everyone must pass.Tier 1: Business Privilege
Defines a user’s system-wide status, such as Owner, Admin, App Manager, or Member. Without this “ID badge,” a user cannot enter the system.
Tier 2: Item Access - The Key to a Building
Once a user is on campus,Item Access Management determines which specific buildings they can enter. In Luklak, “buildings” are high-level components like a 📋 Function, a Dashboard, or a top-level 📂 Area.
Tier 2: Item Access
Controls who can view or manage the containers of work. Your campus ID gets you in, but you still need the specific keycard to enter the “Finance Department” building.
Tier 3: Permission Schemes - The Rules Inside the Building
Once inside a specific building (like a⏹️ Space created from a Function), Permission Schemes govern what a user can actually do. This is the most granular tier of control, defining specific actions on the data within.
Tier 3: Permission Schemes
Controls actions on individual
🧊 Objects. Can you read the files on the desk (View Object)? Can you write on the whiteboard (Edit Object)? Who gets an alert when you do?How The Tiers Interact
A user’s effective permissions are the result of all three tiers working together. A user must have the required access at each level to perform an action. For example, a user might be an Admin (Tier 1) and have access to the “Recruitment”Function (Tier 2), but a Permission Scheme (Tier 3) on a ⏹️ Space for “Executive Hires” could still prevent them from seeing 🧊 Objects related to confidential candidates.
This tiered approach provides a powerful and flexible security framework that can be adapted to any business process.
What’s Next?
Now that you understand the security philosophy, you can begin your deep dive into each component.- Start with the foundation: Managing People: Users, Groups, and Roles
- Explore the first tier of security: Tier 1: System Access with Business Privileges
- See how granular control works: Tier 3: Granular Control with Permission Schemes